Saturday, April 22, 2017

Converting the Hammerli 850 .177 to PCP

Ongoing project,
I really like my Hammerli 850 in .177, it is low power, very accurate at 25m and it is backyard friendly. The only annoying thing is the CO2 88gr and the cooling effect. If you wait 20 seconds between shots then the speed is constant. If you shoot faster, the CO2 cools the cylinder and the pressure drops resulting in slower exit speed of the pellet and loss of vertical accuracy.
On a warm day its different than on a colder day...
HPA would solve all this problems of course.

basic idea:


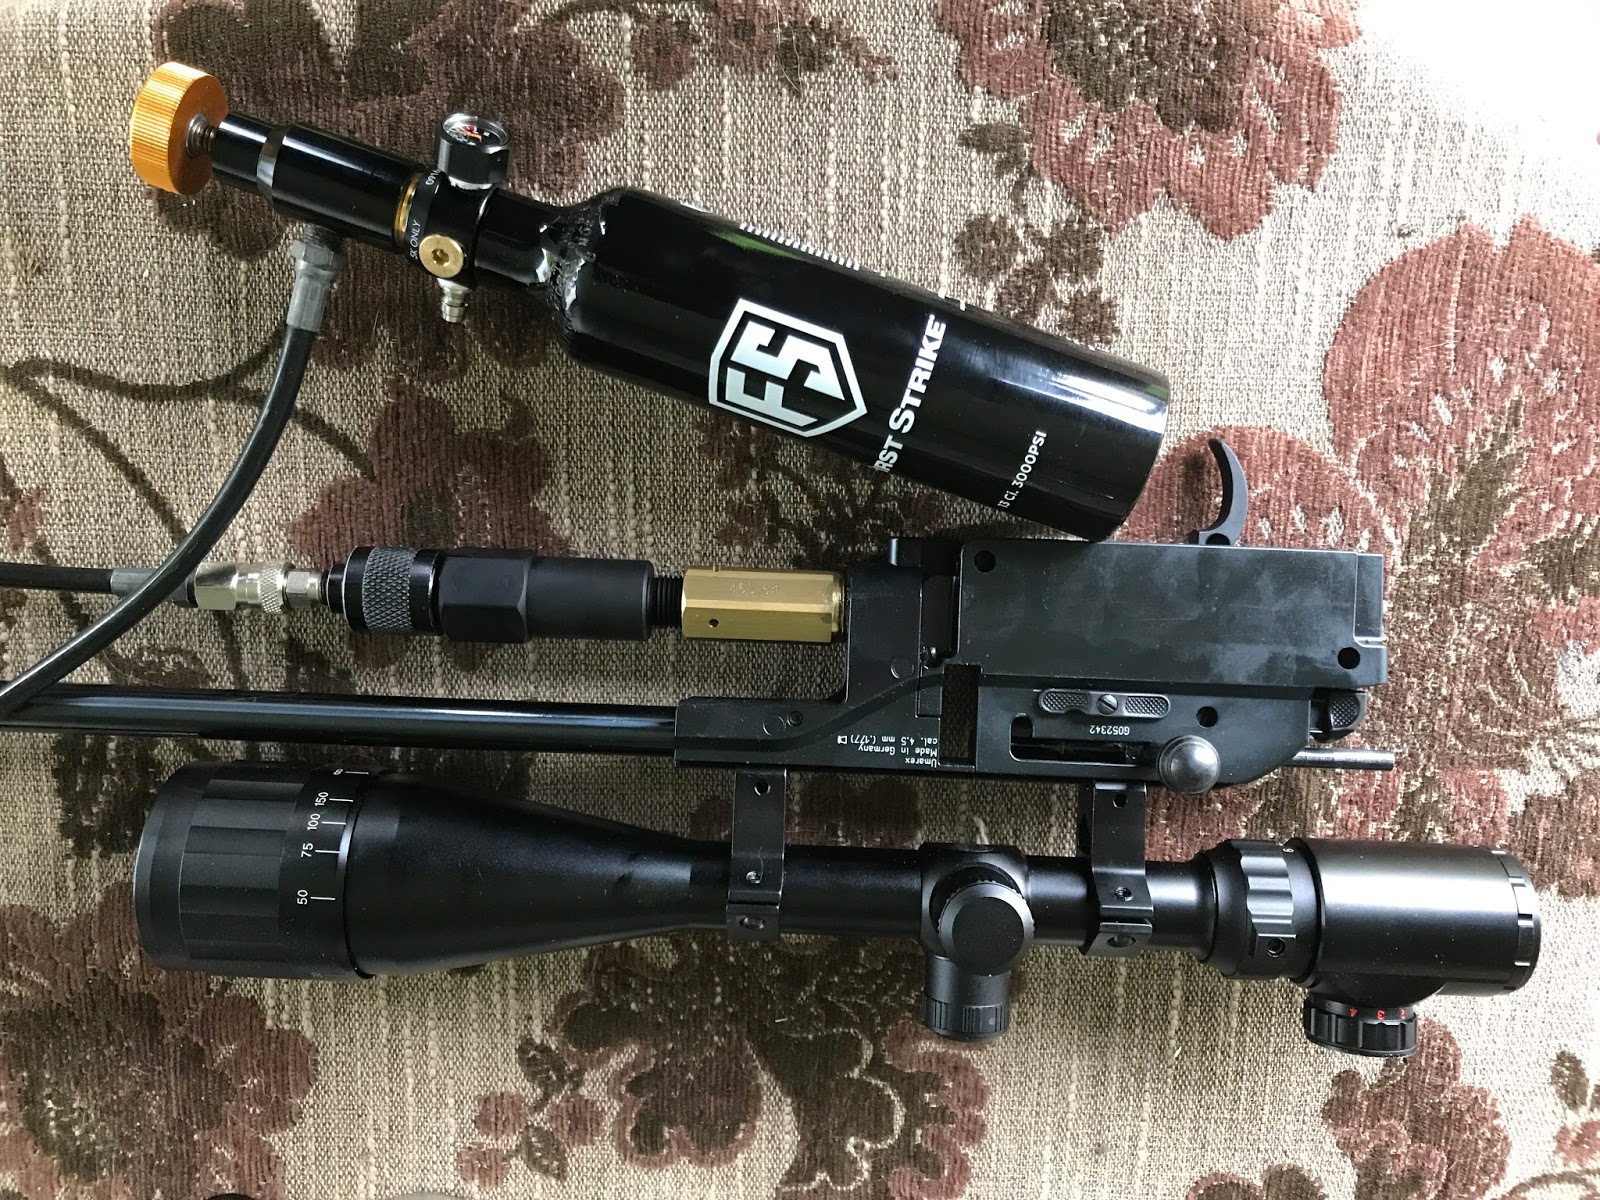
  • get a small aluminium paintball cylinder: 
    First Strike 13CI 3000PSI with hero regulator (800-900psi)

  • get a conversion adaptor from 88g co2 thread to Paintball : 
    Best fittings 850 Air Magnum Adaptor 
  • get a remote filling line for paintball 


2 possible solutions


solution 1

Use the remote fill and the conversion fitting.

pros:

  • no need to chop up anything
  • consistency of HPA
  • can still use 88g co2


cons:

  • the small hpa cylinder needs to be carried along.
  • small hole needs to be cut, to let the remote line exit

First results:

With the standard pressure on the hero regulator of 800psi I get the same results as using CO2. The pellet speed is very constant @530 fps with 15grain H&N. Which is 9.4 Ft. Lbf or 12.7 Joule.
I'll do some more tests in the coming days with the regulator set at 900 psi.


some photos:


small hole drilled to feed the air
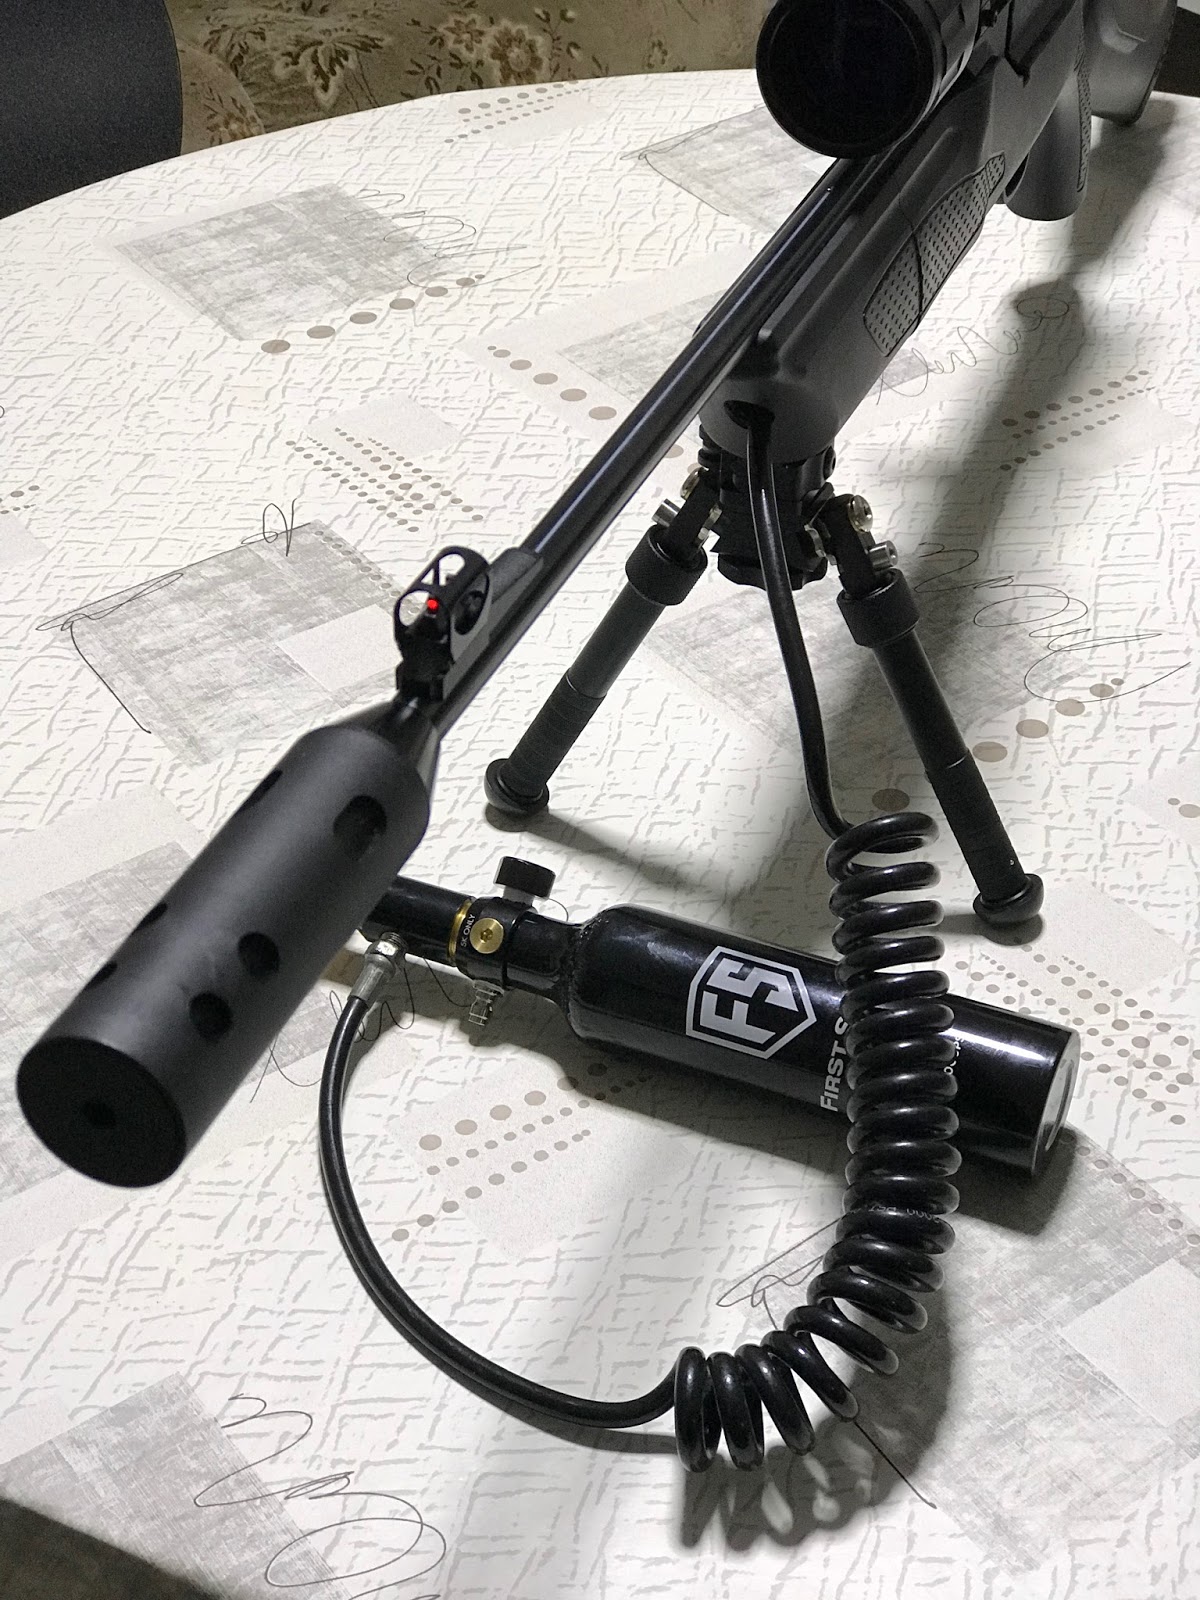
My new benchrest gun in .177


solution 2

Do a full permanent conversion.
the air cylinder needs to be mounted on the hammerli and holes need to be cut for the fill nipple and the gauge

pros:

  • no need to carry the cylinder anymore
  • consistency of HPA


cons:

  • holes need to be cut into the hammerli
  • no more co2 possible


I'm going to start with solution1 and if it works great,  I'll do solution2 after all my CO2 88g runs out.


Saturday, April 15, 2017

Denon AVR-3808 left speaker sound problem

Symptoms:

  • no sound from left speaker when receiver powers on.
  • sound will return after 10 minutes or if volume goes above -15dB
  • crackling sound while changing the volume.
  • no problem with the headphone connection.

What you need:

  • Lots of spare time.
  • The service manual of the receiver. You can download it here.
  • A soldering iron/station. 

This schematic narrows the problem:


Part of SCHEMATIC OF THE CHANNELS
Remember the part that the headphone did not exhibit the problem... The headphone uses a separate relay: RL108
So it's not the amplifier but one of the relay.

The Cause:

  • A failing relay: RL101 DS24D2
Next find the official part number:


And find a shop where they still sell it.  http://www.htv-service-gmbh.de

A few days later in the mail:


So it seems the yamaha genuine parts also work in the Denon, after all it's just a relay.


And now the most difficult part....

The tear down of the receiver:

 We have narrowed the problem, the only thing left to do is to exchange the part....
In the service manual you can find all the steps to fully disassemble the receiver.


Cover removed. 
The RL101 is on the card on the lowest part of the receiver, So we need to remove ALL the cards in  the receiver :( It is a 3D puzzle!

1st part of the 3D puzzle removed
the complete input frame with the complex cards attached removed in one part


RL101 visible, still need to take out the complete board


removed all but front and power-supply
The failing relay on the left , the new relay on the right


the failing relay without the cover
the reassembled 3808


Monday, April 10, 2017

Carette 300 bar 4500 psi compressor review test - Part1

This is a 2 part review, in part2 of the review I will show how you can add your own PMV if you bought the standard version without PMV and autodrain.
Goto part2

My use-case for a compressor:

I need a compressor to fill up my 10L tank from 200bar to 300bar. I use a FX impact with a regulator set at 145bar. It has a cylinder of 480cc @250bar.
Time is no problem, I can wait 2 hours if needed to do the filling.
Since I am only topping up, I have no need for a PMV (in part2 I will install a bauer PMV).
I' m capable of timing 15mins to do the water draining, so no automatic stuff necessary.
I'm looking for a monthly top-up at a reasonable speed: 100bar x 10L = 1000L
I like to have guarantee for several years.
No more than 1500€


5 years guarantee on the compressor block
3 years guarantee on the electric motor
2 years guarantee on the other parts

25L/min fillrate -> 1000L should be done in 40 minutes. I can live with that.


My Compressor with the Philadelphia option ;-)

Specifications:


2 cylinder compressor 300bar
base model, no PMV, no automatic draining


Maintenance schedule:

maintenance part and itemmaintenance contentmaintenance PeriodRemarks
Compressor hostReplace lubricating oil for 0.3L
10-20 hours
1st maintenance
Compressor hostReplace lubricating oil for 0.3L
40-50 hours
2nd maintenance
Compressor hostReplace lubricating oil for 0.3L
70-80 hours
repeat
Air intake filtration coreCheck and sweep 
60 hours
Replace if needed
Oil-water filtration coreREPLACE
20 hours

BeltCheck and adjust
65 hours
Replace if needed
Antifreezing fluidsCheck and adjust
100 hours
replace once every 2 years


attention: only use good quality synthetic compressor oil!

Other reviews online:

an excellent 24hours torture test and tear-down:
http://www.talonairgun.com/forum/viewtopic.php?f=52&t=35990#p371784


Some collected info after my first usage. 

Important: There is NO non-return valve in this compressor configuration, so you can ONLY OPEN your scuba tank AFTER the pressure in the compressor is HIGHER than the tank you are filling! You will harm the compressor otherwise.

update 2017-04-19 : there IS a non-return valve fitted just before the oil water seperator. The manual seems to be lacking this information :)


I pumped my 10L tank from 220bar to 300bar. The compressor was first let run for 10min with no load. Total time took less than 35minutes. No exact timing, will be for the next test. I was only interested in the heat signatures.

Heat signature after 10min with no load

As you can see the first cylinder gets a lot hotter than the second stage cylinder.

Heat signature after 45min with 300bar load

The same difference in temperature is there at full load, but no abnormal temps. The cylinder-heads themselves are staying cool due to the water-cooling passing through them. The other red marking in the picture is the belt.

Temperature readings of both cylinderheads. Spot1=cylinder1 - Spot2=cylinder2


Power was between 960W and 1020W
Just checking..


Temperature of waterpump after 45min

Temperature of air after 2nd stage cooling, before entering the water-oil seperator
Cylinder heat only +3C after charge from 220bar to 300bar

2.5 ml water-oil drained from system during the 35min session


Important: After each fill you should let it do a 3-5 minute no-load run with the draining port open, to clear out any condensate water in the first cylinder!

In part2 I add a PMV to the standard model.